
RFID Tutorial: Impinj Octane SDK
Introduction
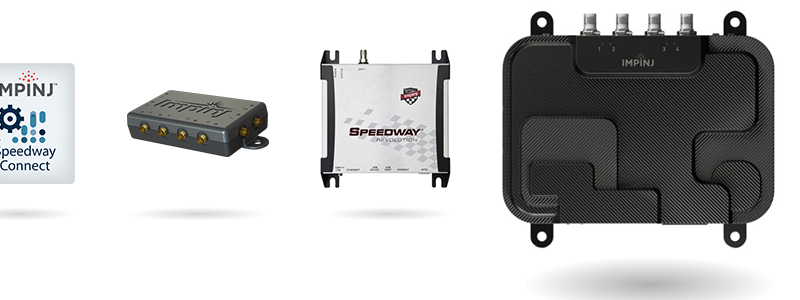
This post is written for developing and deploying a simple Windows device application for controlling a passive RFID system using the Impinj Speedway reader and the Impinj Octane SDK. Additionally, this post explains how to export the received RFID tag data to an Excel file for easy data management.
Purpose
The purpose of this project is to gain an understanding of RFID systems in general and to apply basic software development skills in order to manage sets of data received from an RFID system.
Restrictions
The application is built using C# .NET in Visual Studio 2013 with Windows Presentation Foundation (WPF) and will only work on Windows devices that support this framework. In addition, Microsoft Excel must be installed on the computer because the application interacts with Microsoft Excel libraries. Otherwise, the RFID data can be exported into a CSV file, and then later imported into an Excel file.
RFID Basics
In order to write an optimized solution, some basic knowledge of RFID tags and systems is required. A great source for beginners looking to branch out into the RFID field is the atlasRFIDstore RFID Resources page. This site provides multiple eBooks and buying guides for RFID tags, systems, and applications.
App Development
Setup
The first step to developing the app is to download the Octane SDK from Impinj. Because I wanted to develop this app using C#/.NET, I downloaded the .NET version of the Octane libraries. Once the basic WPF solution was built in Visual Studio, the Octane Library was imported so that it could be used in the solution. (Check out Microsoft's WPF setup guide for more details.) The Octane SDK download includes well documented examples of how to use the SDK for various purposes, including how to set it up in Visual Studio.
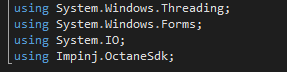
Briefly, to setup the Octane SDK in the Visual Studio Solution, right click on the References item in the Solution Tree and select “Add Reference”. From the resulting screen, online and local reference packages can be installed, including the Octane SDK downloaded earlier. Once this is included in the References section, it can be used in the Solution by including it to the main class’ reference section. In C#, this is done by appending the name of the desired reference package to the end of the word “using” into the header section at the top of the main class page (see example below).
To work with Excel files, the Microsoft Office Excel reference must be added in a similar way. Simply right click on the References item, select “Add Reference” and navigate to the Assemblies item on the resulting page. Under Assemblies, search for “Microsoft.Office.Interop.Excel” and select it to add it to the Reference list. Include the reference into the header of the main file by utilizing the “using” method mentioned above. Alternatively, the “Microsoft Office Interop Excel” library can be found in COM -> Type Libraries -> “Microsoft Excel 16.0 Object Library”. **Note: The Excel reference can only be selected and added to the References list if Microsoft Office is installed on the computer.
Using the Octane SDK
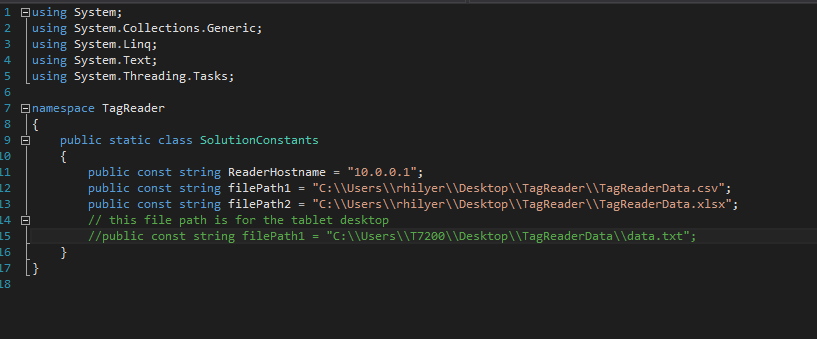
Now that the necessary references have been added in order to use Excel and the Octane SDK, the Solution needs to be setup to communicate with the Impinj Reader. An easy way to do this is to create a new C# class within the solution and keep a public record of all file paths and IP addresses needed for the operation of the reader. To set up a new class, simply right click on the solution name and select “Add -> New Item…” and select C# Class as the new item. I named this class SolutionConstants.cs in order to keep the naming conventions as close as possible to the Octane SDK examples. Within this class, I defined all of the file paths I needed to use for the tag read data export process as well as the static IP address of the reader. An example of how to setup this class can be seen in the image below.
In order to correctly use the classes included with the Octane SDK, the OctaneSdk2Examples solutions should be studied. Running the different classes will allow the user to see firsthand what each example does and will help to build an understanding of each class and function call.
Using the setup outlined above, the Octane SDK should now be available for use with the application. The SDK download includes full documentation on the classes contained in the download. To access the documentation, open the folder to which the SDK was downloaded and navigate to the ‘docs’ directory. Right-click on the ‘index.html’ page and open the file with a web browser, then navigate to the Classes tab. There are a few very important functions and a mandatory object declaration that must take place when using the SDK:
ImpinjReader object
In order to use the ImpinjReader class, a new ImpinjReader object must be declared:
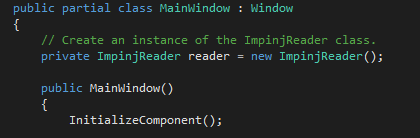
I placed this object declaration outside the MainWindow() section in order to use it as a private global variable. This way, the ‘reader’ object can be referenced everywhere in the main code.
Settings object
The Settings object is declared in order to retrieve and alter the settings of the reader.
All editable settings and their purposes can be found in the SDK documentation.
Settings Functions
These three settings are very important for adjusting the read behavior of the reader, and will need to be adjusted for each custom RFID system in order to achieve the maximum effectiveness desired for a particular setup. Each can be found in the SDK documentation under the Settings class:
- ReportMode: defines how often inventory reports are sent from the reader.
- SearchMode: Used for configuring the tag search mode, which controls whether tags are singulated only once, or repeatedly.
- ReaderMode: Controls the modulation and data rate for the the link between the reader and the tags. AutoSetDenseReader is recommended as the most robust mode. Not all modes are available on all models and regions.
Building the GUI
The Graphical User Interface (GUI) for the application will be the only part that the end user will see. The GUI provides the user with information about the application, as well as controls to interact with the application. Microsoft provides a guide for setting up a basic GUI for a WPF application. Building a basic GUI layout allows the developer to create call events for certain GUI actions, such as button clicks or drop-down menu selections. These events will interact with the back-end code for the application, which contains the function calls for the Impinj Reader. An example of a basic GUI for interacting with an RFID system can be seen below.
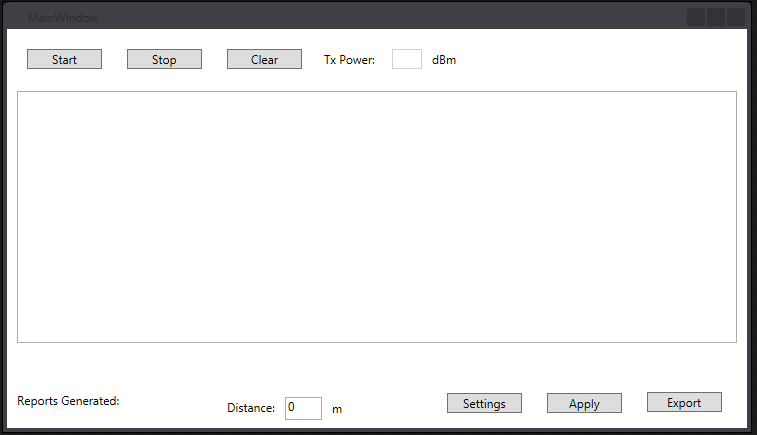
In this example, the Start and Stop buttons are tied to the reader.Start() and reader.Stop() functions, respectively. According to the default settings of the reader, when a tag report is available ( a tag is read), the OnTagsReported event handler is called. By placing a function inside this event handler, the large ListBox (which I named listTags) in the center of the GUI can populate with the tag report information. It is this information that will be exported to an Excel file. There are many tag properties that can be included in the tag report data, but it was only necessary for me to include the tag EPC, RSSI, and the antenna port number that registered the tag reads.
Exporting to Microsoft Excel
My first step in writing the export was to initiate a simple file I/O with the tag report data in order to ensure the correct information was being exported. I simply created a .txt file and wrote the contents of the GUI ListBox to it. After this data was confirmed to be the correct data, the UpdateExcelSheet function was created in order to export the tag report data to Excel. Microsoft provides a basic documentation on how to initialize the Excel application and also provides thorough documentation on their Microsoft.Office.Interop.Excel package. This example project was initialized a little differently, as can be seen in the image below.
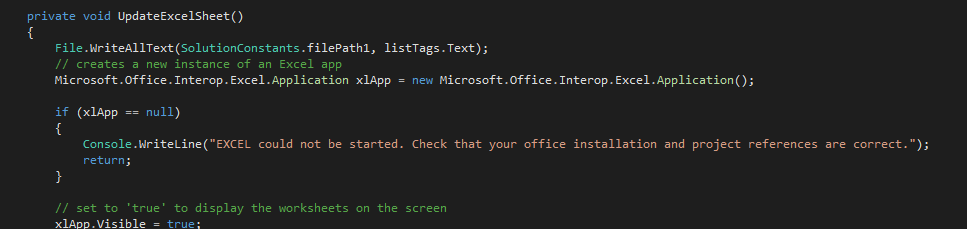
I chose to approach this export in a sort of roundabout way. After trying to export straight from the GUI to an Excel file, I ran into more problems than I cared to find a solution to, mainly with formatting the data to correctly fit into the Excel cells. To avoid these issues, I first exported the tag report data into a .csv file, which Excel can easily read and correctly format.
For each file (one .csv file and one .xlsx file), I created an Excel workbook in the file paths declared in the SolutionConstants class. In each of these files, I created an excel worksheet and loaded the data from the specified file paths into them. Since there is already data in the .csv file, this data will be imported into the Excel worksheet.

In this worksheet, I created variables for 3 data columns, one for each of the parameters I wanted to export (tag EPC, tag RSSI, antenna port #) to the .xlsx worksheet. In the .xlsx worksheet, I created four variables for the data columns (the fourth column was for the Distance variable in the GUI, which I entered manually for different test distances).
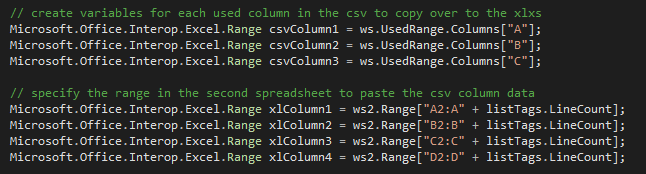
I then cast the tag report data into an array for easy storage, and because arrays can be placed into a column of cells, where each cell takes a different value from the array. After this, the arrays containing the tag report data were copied over to the .xlsx worksheet, and the .csv workbook was closed.
Now that the data has been exported to an Excel worksheet, the tag report data can be organized into charts, graphs, and tables in order to efficiently represent the RFID system data in a graphical manner. Additionally, the data can be well organized and saved for future reference.
Conclusion
For more information on this tutorial, please leave a comment below or contact us.
For more information on all things RFID, check out our RFID resources page and our YouTube channel.
To read more articles about Impinj products, check out the links below!
R420 -
- How to Set Up The Impinj Speedway Revolution R420 RFID Reader
- Impinj R420 UHF RFID Reader Quick Start Guide - Starting Reading RFID Tags with the R420 in 3 Minutes
R700 -
- Introducing the Impinj R700 UHF RFID Reader
- Impinj R700 UHF RFID Reader Overview | Product Specs, Features, & Key Highlights
ItemTest -
- Downloading, Installing, and Using Impinj's ItemTest Software
- Encoding an RFID Tag in Impinj's ItemTest Software
Speedway Connect Software -