Mercury API SDK C# Documentation
Introduction
This documentation is for the Mercury API SDK provided by ThingMagic for a .NET application. This specific documentation will be for a C# implementation of the SDK written in Microsoft Visual Studio 2013 for a ThingMagic USB Plus+ (M5e-based) reader.
Setup
- The first step is to download the Mercury API SDK from http://thingmagic.com/index.php/manuals-firmware. Save and extract this zip folder to a directory. Remember the location of the extracted files, as they will be needed in the C# solution. Additionally, ensure that the latest firmware for the device has been installed. This requires a downloaded copy of the latest firmware and the Universal Reader Assistant software.
- Open Visual Studio and create a new WPF project. Once the new project has been generated, right click on ‘References’ in the sidebar and select ‘Add Reference’. In the resulting window, select the ‘Browse’ button and navigate to where the downloaded SDK files were extracted and select the MercuryAPI.dll file inside the C# directory (ex. mercuryapi-1.27.3.16\cs).
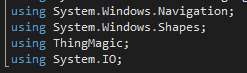
- At the top of the MainWindow.xaml.cs page of the project, type “using ThingMagic;” in order to add the MercuryAPI.dll to the project’s references.
Create the Reader Object
- The Reader object provides the programmer with all of the methods needed to interact with the ThingMagic reader. The documentation includes a description of the SerialReader subclass for USB readers, but this class does not inherit all methods and parameters from the Reader class, so it is best to just use the Reader class. This is done by using the Reader.Create() method. Before this object can be created, some preliminary information needs to be known:
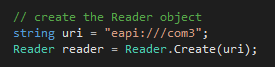
- Both Reader and SerialReader classes require a Uri string in order to construct the object. This string will vary depending on how the reader communicates with the host computer. Since this application is for a USB reader, the Uri will look like “eapi:///comX”, where ‘X’ is the COM port that the USB reader connects to on the computer. For a device that communicates via a network connection (such as Ethernet), the Uri string will be similar to “tmr://192.168.1.101/”, where this IP address would be replaced by the IP address of the reader.
- The finished ‘create’ method for the Reader object should be similar to the example below:
Connect the reader object
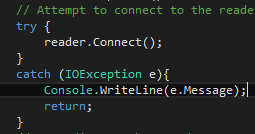
- Once the reader object has been created, it needs to be connected via the Uri string provided in the reader constructor. The ‘Connect()’ method will use this string in order to attempt to establish a connection to the reader. For the USB reader, the specified COM port will be interrogated in hopes of a response from the reader. If a response is received, the baud rate of the reader will be set to the default (115200 bits/sec) and the connection will be established. The ‘Connect()’ method is called by “reader.Connect();”.
Set the Region of Operation parameter
- According to the API documentation, SerialReader objects require the 'Region of Operation' to be set after the ‘Connect()’ method has been called. To do this, use the reader method ‘reader.ParamSet(string key, Reader.Region)’. To see the available region settings for your device, you can use the ‘reader.ParamGet(string key)’ method as shown below.

Perform a synchronous Read operation
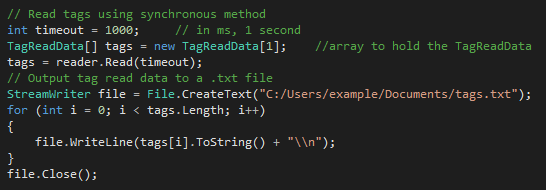
- The synchronous ‘Read(int timeout)’ operation is used for applications that do not require additional events to occur while a tag read is in process. The time argument is in milliseconds, and determines the amount of time that the tag read process will take place.
- For every individual tag read, a TagReadData object is created and placed into an array. For every time an individual tag responds within the allotted read time, the tag’s ReadCount metadata will increment by one.
- Create a TagReadData array to store each TagReadData object and assign this array to the return value of the ‘reader.Read(timeout)’ method. This will cause the array to be populated with every tag EPC that is read within the ‘timeout’ time period.
- I chose to output this data to a .txt file using the System.IO StreamWriter class.
Perform an asynchronous read operation
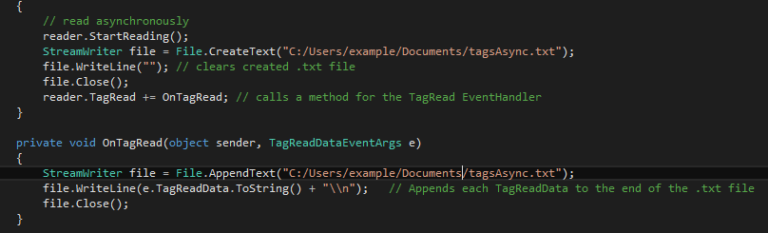
- The asynchronous read operation allows for the tag read process to occur alongside other processes simultaneously. This process uses an EventHandler method to automatically perform specified actions with each received TagReadData object. I chose to create another .txt file in which to keep the read tag data.
- For the asynchronous read method, the read process must be started and stopped using ‘reader.StartReading()’ and ‘reader.StopReading()’ respectively.
Stop reading at N number of tag reads
- The asynchronous read process allows for the inclusion of a “Read Plan”, which allows for customization of reader activities. Using a StopTriggerReadPlan object allows for the creation of a read plan that stops reader activity after a specified number of tags have been read. For this ReadPlan, an exception occurs if the ‘StartReading()’ method is not called before the ReadPlan parameter is set.

Filtering reads to a specific tag
- In order to filter the asynchronous read operation to a specific tag, a ReadPlan must be used and applied before the ‘reader.StartReading()’ method has been called. To use the SimpleReadPlan constructor to isolate a single tag, a new TagData object must be created with the desired EPC to isolate. Also, a TagProtocol matching the desired tag must be placed in the constructor.

Adjusting read/write power
- For many applications, the antenna read and write power will need to be adjusted in order to perform properly in an environment. This can be accomplished by utilizing the ParamSet method on the “/reader/radio/readPower” and “/reader/radio/writePower” parameters of the Reader object. However, there are restrictions on the power levels for each reader. To check the reader’s max and min power levels (in centi-dBi), use the ParamGet method on the “reader/radio/powerMax” and “reader/radio/powerMin” parameters.


Adding Excel Functionality
-
- While the tag data can be written straight to a .csv file and opened in Excel, sometimes it is more helpful to utilize some of the functionality of Excel when exporting tag data. To do this, Excel must be installed on the host machine and the correct references must be added to the Visual Studio solution. Simply right-click References in Solution Explorer and select ‘Add Reference’. Under ‘Assemblies’, search for and select the ‘Microsoft.Office.Interop.Excel’ reference and select ‘OK’.
- Now Excel functionality can be used in the solution. To have a clean export, I first saved the tag data into a .csv file, with each TagReadData parameter separated by a comma. This allows for the .csv file to separate each parameter into its own cell in Excel. If no further Excel functionality is desired for the data, the .csv file can be used as it is to represent the tag data.

-
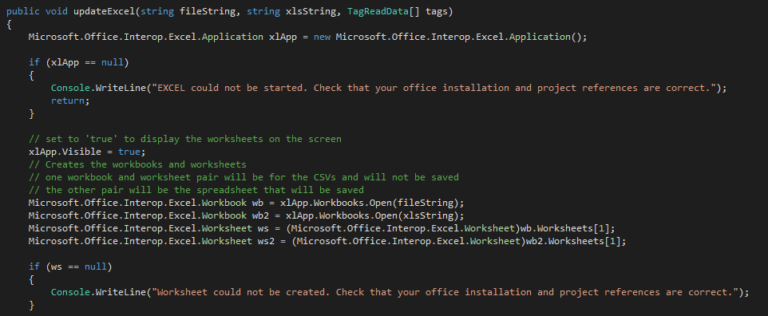
- Now the Excel workbooks and worksheets must be created to house the tag data. I created the updateExcel() method and called it immediately after a synchronous read was performed. Within the method, I created a workbook for the .csv and a separate workbook for the .xls file. This isn’t necessary, but I wanted to show that multiple workbooks can be opened and manipulated using this method.
-
- Next, I copied the cells that were used in the .csv file over into a .xls file. Choosing specific cells like this is part of the Excel functionality added earlier. This is particularly helpful if the data export needs to be saved to a specific file that needs to retain a specific format.
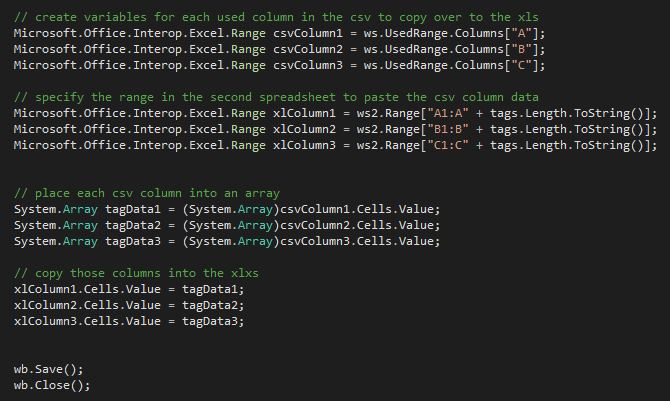
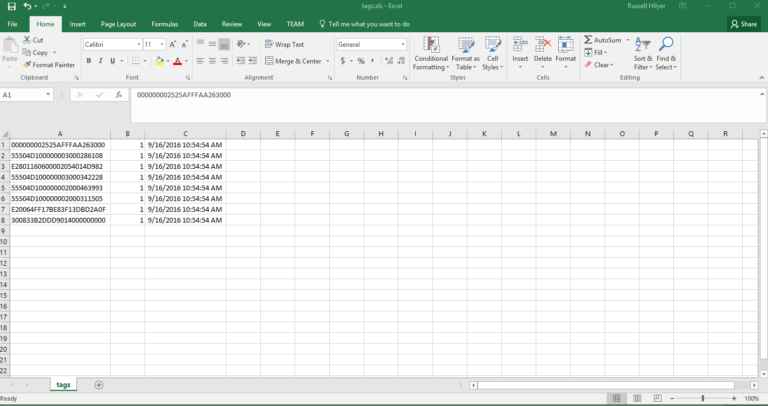
- In this case, the spreadsheet that is generated is a plain .xls file that contains the tag data, where each tag read data parameter is contained in a separate cell.
Conclusion
For more information or if you have any questions about using the ThingMagic API, please comment below or contact us.
For more information on all things RFID, check out our RFID resources page and our YouTube channel.
To learn more about RFID, check out the links below!